ESP32 and ESP8266 are popular Wi-Fi development boards commonly used in the Internet of Things (IoT) application development. These Arduino-compatible microcontroller boards are easy to prototype with and suitable for production versions.
ESP32 is a powerful 32-bit microcontroller featuring multiple GPIOs, 12-bit ADCs, a DAC, touch pins, and serial interfaces such as I2C, SPI, UART, and I2S. Many ESP32 variants also include a display, built-in camera, and/or microphone. With integrated Wi-Fi and Bluetooth capabilities, it’s a reliable choice for any internet-enabled application.
ESP32 is particularly well-suited for cloud-based IoT solutions, including those supported by AWS IoT Core or similar platforms. It includes a Wi-Fi library that simplifies connecting the board to a network. However, this requires Wi-Fi credentials to be hard-coded into the firmware, which is unsuitable for commercial products. Wi-Fi provisioning offers a solution to this limitation.
In this project, we’ll demonstrate how to set up Wi-Fi provisioning on the ESP32, enabling it to be used in commercial IoT products and supporting over-the-air (OTA) updates.
ESP32 Wi-Fi modes
ESP32 supports four Wi-Fi modes, as follows:
- Station mode
- Access point mode
- Station + access point mode
- Promiscuous mode
In station mode, ESP32 acts as a client. It connects to a Wi-Fi access point, such as a home router or public hotspot, and receives an IP address from the router’s DHCP server. This mode allows ESP32 to access the internet, communicate with other devices on the same local network, and send data to a cloud server.
In access point mode, ESP32 creates its own Wi-Fi network. Other devices, such as smartphones, laptops, and IoT devices, can connect to this network. In this case, ESP32 operates as a software-enabled access point, broadcasting its own SSID and assigning IP addresses to connected devices using its built-in DHCP server. This mode enables direct communication between ESP32 and other devices without requiring a router. It’s also the only mode that supports Wi-Fi provisioning and is often referred to as softAP mode.
In station + access point mode, ESP32 combines the functionality of both station and access point modes. This is the default Wi-Fi mode. It allows ESP32 to connect to an existing Wi-Fi network while simultaneously creating its network for other devices. This setup is useful when ESP32 needs to fetch data from the internet and share it with local devices.
Promiscuous mode is a special low-level mode. In this mode, ESP32 monitors and captures all Wi-Fi traffic on a specific channel, regardless of whether packets are addressed to its MAC address. This mode is valuable for network analysis, debugging, and security research. It can be used to detect nearby Wi-Fi devices, analyze traffic, or build a Wi-Fi sniffer.
Wi-Fi provisioning
Wi-Fi credentials cannot be hard-coded in commercial products. Devices must connect to a local Wi-Fi network at their deployment site to access the internet or join a network. To achieve this, a method known as Wi-Fi provisioning is employed. Wi-Fi provisioning involves supplying credentials that allow the device to connect to a network and obtain an IP address.
Two main network parameters are required to connect to an existing Wi-Fi network or access point: the network’s Service Set Identifier (SSID) and the network’s password. SSID stands for Service Set Identifier and represents the name of the Wi-Fi network. If the network is secured, the password serves as the key to access it.
There are several methods for Wi-Fi provisioning in IoT devices, including SoftAP provisioning, Bluetooth Low Energy (BLE) provisioning, SmartConfig (UDP broadcast), QR code or NFC tag provisioning, Wi-Fi Protected Setup (WPS), USB provisioning, Ethernet provisioning, static provisioning, and cloud-based provisioning.
ESP32 supports SoftAP provisioning. In this method, ESP32 first acts as an access point. When a smartphone or laptop connects to it, ESP32 hosts a webpage or web application at a fixed IP address. This interface allows the user to select an available Wi-Fi network and save its credentials to ESP32. Once the credentials are saved and verified, ESP32 restarts in station mode and connects to the selected Wi-Fi network. After provisioning, even if ESP32 is reset, it will boot into station mode and stay connected to the designated network.
Arduino libraries for Wi-Fi provisioning
There are multiple libraries available for Wi-Fi provisioning on ESP32 and ESP8266. These include ESPAsync_WiFiManager by Khoi Hoang, WiFiManager by Tzapu, ESP_WiFiManager by Khoih-prog, and WiFiProvisioner by Santeri Lindfors. In this project, we will use the WiFiManager library by Tzapu for provisioning Wi-Fi credentials on ESP32.
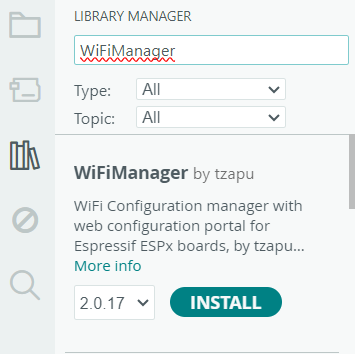
Installing the WiFiManager library
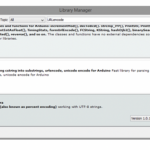
To install the WiFiManager library, open the Library Manager in Arduino IDE and search for “WiFiManager.” Select the version by tzapu and click the “Install” button. The library will then be installed.
Alternatively, you can download the library as a ZIP file from GitHub. After downloading, go to Sketch > Include Library > Add .ZIP Library and select the downloaded ZIP file for WiFiManager. The library will then be added to your Arduino environment.
ESP32 Wi-Fi provisioning
Once the WiFiManager library is installed, upload the following code to ESP32.
#include <WiFiManager.h> // https://github.com/tzapu/WiFiManager
void setup() {
Serial.begin(115200);
WiFiManager wm;
bool res;
res = wm.autoConnect(“AutoConnectAP”,”password”);
if(!res) {
Serial.println(“Failed to connect”);
}
else {
Serial.println(“connected”);
}
}
void loop() {
}
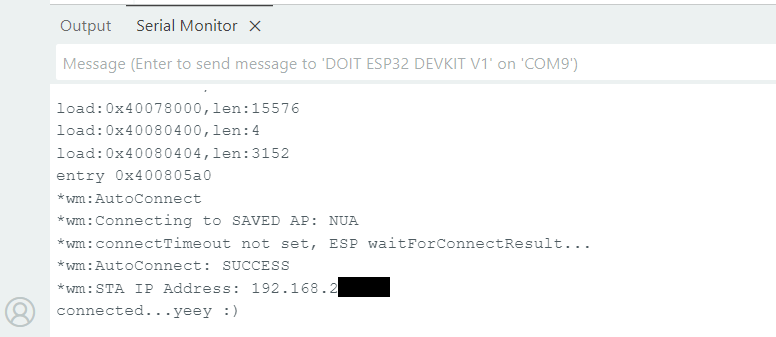
The sketch imports the WiFiManager library and instantiates an object named ‘wm’ from the WiFiManager class in the setup() function. A Boolean variable ‘res’ is defined to store the result of the WiFiManager connection attempt. The connection is initiated by calling the autoConnect() method of the WiFiManager class.
This method sets two parameters: the SSID of ESP32’s access point and the network key for clients to connect to ESP32.
Once the code is uploaded to ESP32, reset the board and check the available Wi-Fi networks on your smartphone or laptop. The ESP32 will initially configure itself as an access point and will appear as a Wi-Fi network. Since the SSID is defined as ‘AutoConnectAP’ in the code, it will appear with that name in the list of available networks.
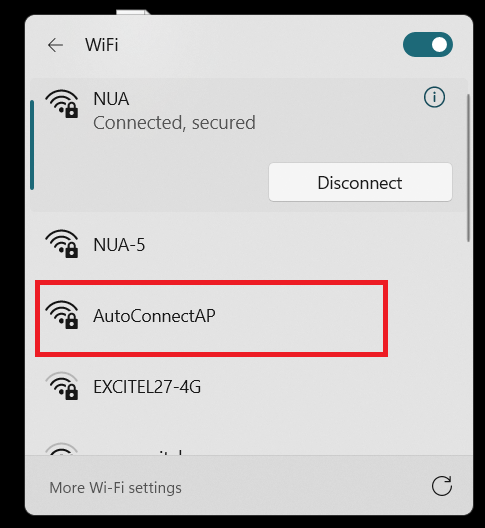
To connect to ESP32 access point, enter the password defined in the sketch. In this case, the password is set to “password.” Enter it and click ‘Next.’

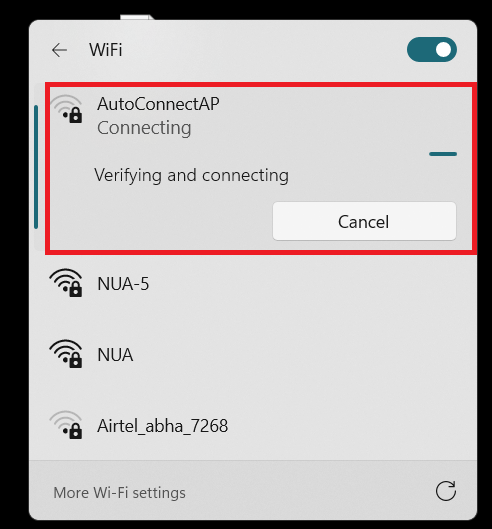
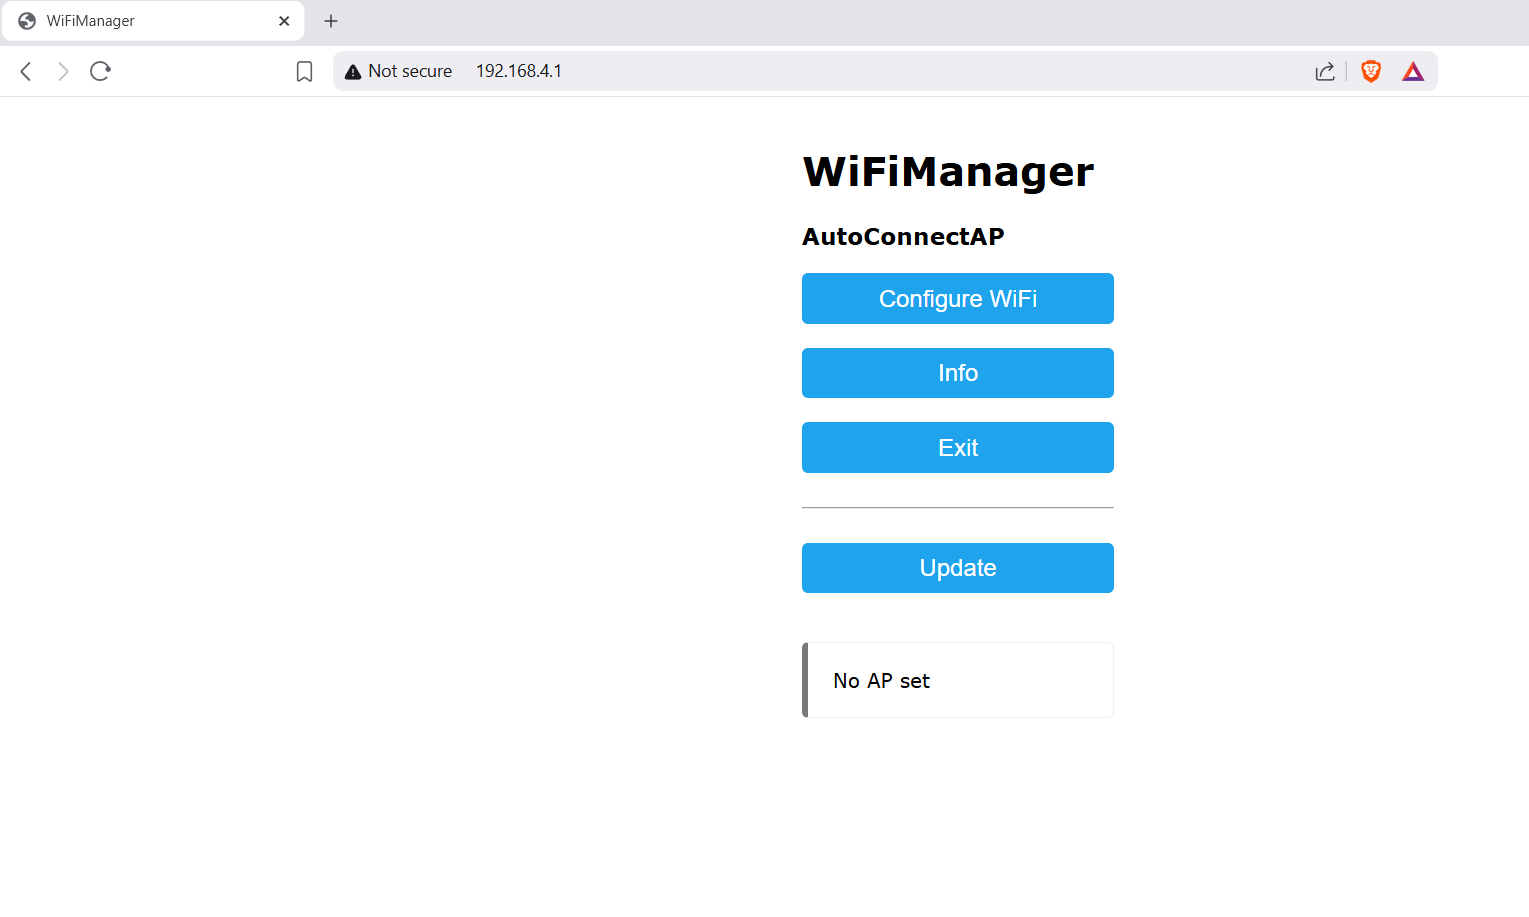
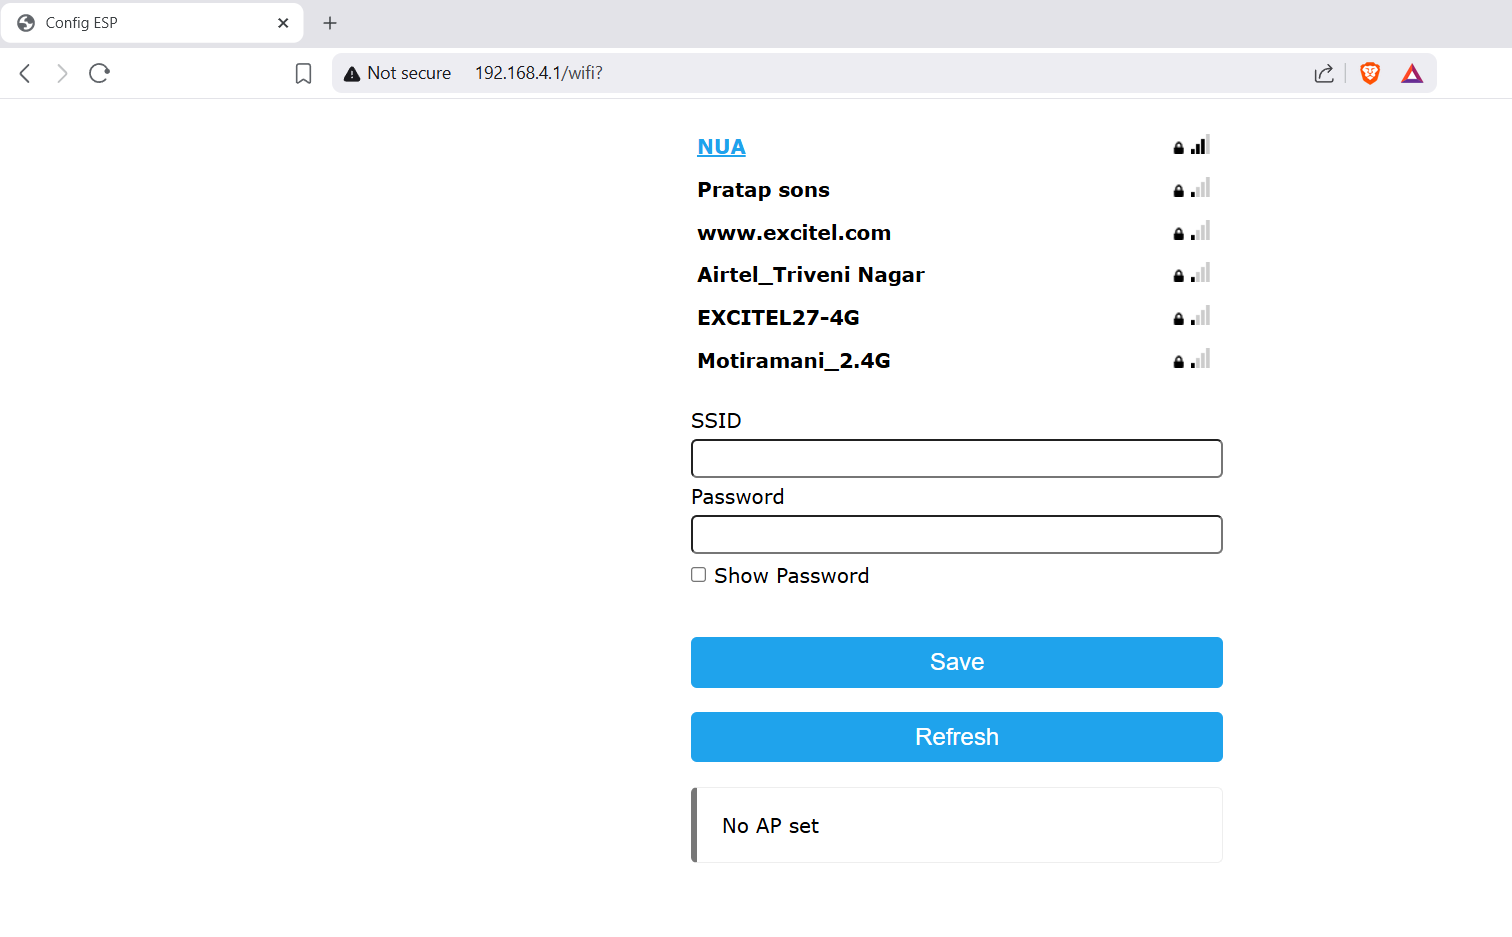
Now, your smartphone or laptop will be connected to the ESP32 access point as a client. Open a browser and go to 192.168.4.1. This connects to ESP32’s web server and opens the WiFiManager page.
You will see four options:
- Configure Wi-Fi – used for Wi-Fi provisioning of ESP32
- Info – displays information about ESP32
- Exit – closes the web application
- Update – used for OTA updates of ESP32 code
Select the ‘Configure Wi-Fi’ option.
Next, select your Wi-Fi, enter its SSID and network key, and click on ‘Save’ button.
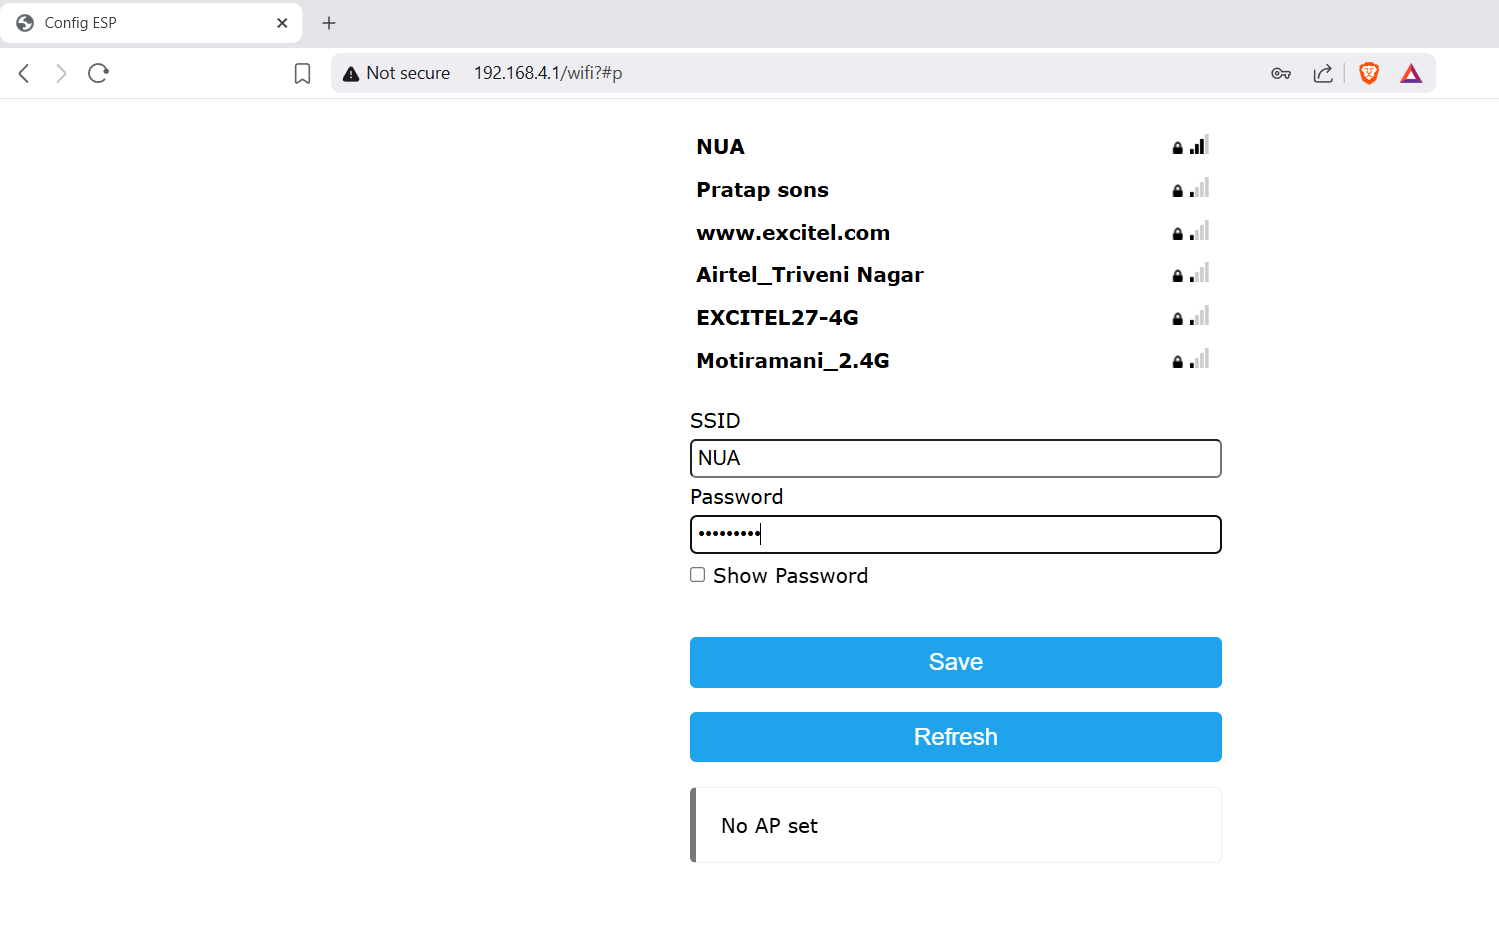
The provided Wi-Fi credentials will be saved in ESP32. ESP32 will then restart in station mode. If the credentials are correct, it will connect to the existing Wi-Fi network. ESP32 will remain connected to the designated network even after a reset.
Adding ESP32 Wi-Fi provisioning to existing codes
To add the Wi-Fi provisioning to the existing project’s code, include the WiFiManager library at the top of the code.
#include <WiFiManager.h>
Search the following statement.
WiFi.begin(ssid, password);
Replace the statement by the following code block.
WiFiManager wm;
bool res;
res = wm.autoConnect(“AutoConnectAP”,”password”); // password protected ap
if(!res) {
Serial.println(“Failed to connect”);
// ESP.restart();
}
else {
Serial.println(“connected”);
}
The sketch for an existing project will now support Wi-Fi provisioning, and you’ll no longer need to hard-code Wi-Fi network parameters.
On-demand Wi-Fi configuration
What if ESP32 is deployed to a new location or needs to connect to a different network? In such cases, you can configure ESP32 for on-demand Wi-Fi provisioning. This feature is supported by the WiFiManager library.
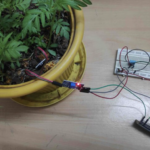
To enable on-demand provisioning, connect a push button to the ESP32. When the button is pressed, ESP32 will reinitialize as an access point and start the Wi-Fi provisioning process. For this example, connect the pushbutton to GPIO13.
The circuit for on-demand configuration will be as follows.

Lastly, upload the following sketch to ESP32.
#include <WiFiManager.h> // https://github.com/tzapu/WiFiManager
#define TRIGGER_PIN 13
int timeout = 120; // seconds to run for
void setup() {
WiFi.mode(WIFI_STA);
Serial.begin(115200);
Serial.println(“\n Starting”);
pinMode(TRIGGER_PIN, INPUT_PULLUP);
}
void loop() {
if ( digitalRead(TRIGGER_PIN) == LOW) {
WiFiManager wm;
wm.setConfigPortalTimeout(timeout);
if (!wm.startConfigPortal(“OnDemandAP”)) {
Serial.println(“failed to connect and hit timeout”);
delay(3000);
ESP.restart();
delay(5000);
}
Serial.println(“connected”);
}
}
After uploading the sketch to ESP32, pressing the pushbutton connected to GPIO13 will trigger ESP32 to re-enter Wi-Fi provisioning mode and connect to a new available Wi-Fi network. You can use any other GPIO pin for this function as long as it’s assigned to the variable TRIGGER_PIN in the sketch.
Conclusion
For production versions of ESP32-based IoT devices, Wi-Fi provisioning is essential, just as it is in any commercial IoT product. Hard-coding Wi-Fi parameters are not practical for commercial use.
Devices must connect to a user’s or customer’s Wi-Fi network through a provisioning process. ESP32 supports SoftAP provisioning, and in this project, we implemented it using the WiFiManager library.
You may also like:


Filed Under: Tutorials
Log in to leave a comment:
Lost your password?
Don't have an account? Register here