Cyber security is a growing concern. As homes and offices are more connected than ever, the risk of cyber attacks, identity theft, and hacking has increased significantly.
A network has several smart devices connected to one another and the internet. In the case of a cyber-attack, each connected device is at risk. One effective way to protect a home or office network is to use a virtual private network or VPN.
A VPN hides your IP address by redirecting the network through a remote server run by a VPN host. This private network essentially disguises one’s online identity and encrypts the internet traffic coming to that network. It does this so well that even an internet service provider (ISP) or any third party cannot decipher which websites you visit or data you download or upload online.
A virtual private network is ideal for protecting one’s identity, securing data transfers, encrypting online data, and letting users access geographically restricted web content.
There are many different types of VPNs, but these three are the most common:
- SSL VPN – implemented through any HTML-5 browser and available for nearly all operating systems. This type of VPN is accessed through authentication on the browser with the help of a username and password.
- Site-to-Site VPN – ensures secure and encrypted communication between two separate networks (or intranets) from the same company. It operates between two LAN/WAN networks within the same premise.
- Client-to-Server VPN – implemented through a VPN client installed and configured on a computer. This is the most common and efficient VPN. It connects you to the internet directly via the VPN host instead of an internet service provider.
VPN client servers can be installed and configured on microcomputers like Raspberry Pi (RPi). RPi serves as a gateway to the internet while securing and encrypting all smart-device access.
In this article, we’ll install and configure OpenVPN, a VPN client, on Raspberry Pi. RPi can operate 24/7 without consuming much power, making it a cost-effective option. Once the VPN is configured, you’ll have access to your smart devices wherever you are, at home or away.
Components required
1. Raspberry Pi
2. MicroSD card
3. Keyboard and mouse (for installation and configuration only)
4. Display monitor and HDMI cable (for installation and configuration only)
5. Ethernet cable or WiFi
Prerequisite
Before starting, the Raspbian operating system must be installed on Raspberry Pi. The VPN client is a software application that runs over the operating system. Any Debian Linux derivative can run on RPI as an operating system. Raspbian is the official OS for the microcomputer and the one easiest to install and work with. It requires no manual configuration of features such as the keyboard layout, region, and language.
Remember, once you set up a VPN on Raspberry Pi for your home or office network, all of your computers and smart devices will be connected to one another. So, make sure they’re all secure before continuing.
VPN server’s IP
An IP address for the VPN is necessary, which can be a static or dynamic IP address. Setting up the VPN for a static IP address is straightforward, whereas a dynamic IP requires a domain name service (DNS). The domain name could be your own or a free one (check out no-ip.org at no cost).
Port forwarding on RPi
After getting an IP address for the VPN, port forwarding the OpenVPN application is the next step application. The default port for OpenVPN is 1194. The protocol used by this port is UDP.
Here are the steps:
1. On a computer connected to your home/office network, open the router admin page on a web browser. The router IP is 192.168.1.1 or 192.168.1.254.
2. On the router admin page, enter the username and password. Typically, this is set to admin and admin, respectively.
3. After logging into the router admin page, navigate to forwarding -> virtual server.
4. On this page, there are options for service port, IP address, internal port, protocol, and status. These settings will route internet traffic from the specified port to the port on Raspberry Pi.
Note:
- The service port is the external port
- The IP address is the IP address of the Raspberry Pi
- The internal port must be set to Raspberry Pi’s application port
- The protocol is the internet protocol used by the application port, which must be set to ALL unless specified
- The status must be set to enabled
- For OpenVPN, set the internal port to 1194 and the protocol to UDP.
Installing the VPN server
Setting up a VPN server on Raspberry Pi involves several steps. For example, there’s installing the VPN application, generating the encryption keys, adding a port to the firewall, setting a static IP for RPi, and others.
All of this gets complicated. An easier method is to use a script for the installation. Fortunately, the PiVPN script is available for Raspberry Pi models, simplifying the processes and reducing the chance of errors.
Let’s start by changing Raspberry Pi’s password. After setting up a VPN server on RPi anybody can access the microcomputer through the VPN, so changing the default password is important.
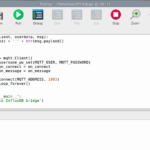
To do so, open the Terminal and execute the following command.
passwd

After changing RPi’s default password, download the PiVPN script from GitHub by running the below command in the Terminal.
curl -L https://install.pivpn.io | bash

After downloading the script, you’ll be prompted by the following screen.
 Press ‘Enter’ to start installing the script.
The next screen will explain that you must set up a static IP for your VPN to function properly. When Raspberry Pi is re-started, it will try and use the same IP address. If the IP address is changed, access to the VPN will be lost. Press ‘Enter’ to continue.

Next, you’ll be asked if you’re using a DHCP reservation on your router. If you’re uncertain, select ‘No’ to continue. Also select ‘No’ if you do not want to set the displayed address as the IP for your VPN.
However, to set your current IP address and gateway as static, select ‘Yes.’

If you selected ‘No,’ a screen will appear warning you that your router may assign the IP address to another device. Most routers can sort out this on their own. Select ‘Ok’ and press ‘Enter’ to continue.

The next screen will prompt you to set a user that will own the OpenVPN configuration file. Select ‘Ok’ and press ‘Enter’ to continue.

The following screen will present a list of users — of which one can be selected to own the OpenVPN configuration file. (If there are more than one Raspberry Pi users, the full list of users will be displayed. If there’s only one default user, it will be displayed alone.)
The list can be navigated by using the arrow buttons. Choose the correct user by pressing the space bar. Once you have selected a user, press ‘Enter.’
 You’ll be asked what type of VPN you want to install on Raspberry Pi. There are two choices available: WireGuard and OpenVPN. Use the arrow keys to navigate to OpenVPN and select it by pressing the space bar. Then, press ‘Enter.’

Next, you’ll be asked if you want to customize the settings for OpenVPN. The settings chosen by the PiVPN script are ideal for most users and need not be changed unless required. Select ‘No’ and press ‘Enter’ to continue.

You must select the port that OpenVPN will operate through. By default, port 1194 is selected and displayed on the screen. It’s recommended to continue with this default port. Select ‘Ok’ and press ‘Enter.’

You’ll be prompted to confirm the port for the OpenVPN installation. Select ‘Yes’ and press ‘Enter.’

You’ll see a list of DNS service providers. Choose the DNS provider with the URL for your VPN’s IP address. You can move through the list using your arrow keys and select the correct DNS provider by pressing the space bar.
Here, we are selecting “cloudfare” as our DNS provider. Afterwards, select ‘Ok’ and press ‘Enter.’

Next, decide whether you want to use a public IP address or a DNS entry. If you’re using a dynamic IP address, go with the DNS entry. Otherwise, choose the static public IP address.
In our example, we’re using a static public IP address. Move through the options using your arrow keys and select one by pressing the space bar. Then, select ‘Ok’ and press ‘Enter.’

A screen will appear informing you that the server key and HMAC key will be generated. Select ‘Ok’ and press ‘Enter’ to continue.

An explanation of the unattended upgrades is presented next. It will automatically download security package updates on a daily basis. Select ‘Ok’ and press ‘Enter.’

You’ll be asked to enable unattended upgrades. Select ‘Yes’ and press ‘Enter’ to confirm the updates. It’s important to do so to protect Raspberry Pi from any security risks.

The next screen should show that the installation of OpenVPN is complete. Select ‘Ok’ and press ‘Enter.’

Lastly, a screen will appear prompting you to reboot Raspberry Pi, which is necessary to complete the installation. Select ‘Yes’ and press ‘Enter’ to reboot RPi.


An OpenVPN username
After completing the OpenVPN installation, it’s possible to use the server. But first, it’s necessary to set up an OpenVPN user. Typically, this is a cumbersome task that involves generating individual certificates for each user.
Fortunately, with PiVPN, all of this can be done with a single command as follows.
sudo pivpn add
You’ll be asked to enter a name for the client, which will act as an identifier to differentiate VPN users. You’ll also be asked to enter a password. Choose a secure password and press ‘Enter.’
The script will initiate Easy-RSA to generate a 2048-bit RSA private key for the client and store it in the file into /home/pi/openvpn folder.
 Now, you have a client setup for OpenVPN. We’ll also need to connect the VPN server to your home/office network and its smart devices. This can be done using a secure file transfer protocol (SFTP) within your local network. You must install a file server program, such as FileZilla, for this.
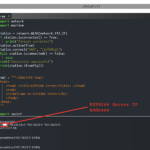
Before launching FileZilla, get the IP address of your Raspberry Pi by executing the following command in the Terminal.
hostname -I

Once complete, open FileZilla on your computer, and enter the IP address of Raspberry Pi preceded by ‘sftp://’ in the host tab. Enter the Raspberry Pi username and password and tap on the ‘Quick Connect’ button.

After logging in, locate the openvpn folder and double-click on it.

Find the .opvn file in the folder and drag it to your desktop or a new folder on your computer. This .opvn file will be used to make a connection with the VPN server. The file stores all of the data required for a secure connection with the OpenVPN like IP address and the encryption keys. The only thing that it does not contain is the password for connecting with the VPN.
Next, download the official OpenVPN client from this link and install the client on your computer. After you run it for the first time, you’ll find it in the taskbar. Right-click on the icon of the OpenVPN client and select ‘Import file.’

A file explorer window will pop up on your computer. Go to your desktop or the folder where you have downloaded the .opvn file.

Double-click the file to import it into the OpenVPN client. When the file is imported successfully, you’ll receive the below message.

Right-click the OpenVPN client icon from the task bar and click on the ‘Connect’ button.

The openVPN client will read data from the .opvn file and you will be prompted to enter the password. Enter it and then click ‘OK.’

The OpenVPN client will connect to Raspberry Pi’s OpenVPN server. The OpenVPN icon in the taskbar will turn to green once successfully connected with the VPN host. You now have a functional VPN that can connect via the internet.
Uninstalling the VPN
If for any reason, you want to remove the VPN server from Raspberry Pi, run the following command in the terminal.
sudo pivpn uninstall
You’ll be asked if you want to remove each package and remove auto-updates. Select ‘Y’ for all. Raspberry Pi will reboot after the uninstallation is completed.

You may also like:


Filed Under: Raspberry pi., Tutorials

Questions related to this article?
👉Ask and discuss on Electro-Tech-Online.com and EDAboard.com forums.
Tell Us What You Think!!
You must be logged in to post a comment.