ChirpStack is an open-source LoRaWAN Network Server that provides a solution for managing and maintaining LoRaWAN networks. LoRaWAN is a low-power, wide-area networking protocol. This article offers a step-by-step guide to ChirpStack installation, allowing a stable Internet-of-Things (IoT) network foundation.
To learn how to connect and set up the initial hardware, please refer to this article: this article, which provides a comprehensive guide to ChirpStack and setting up a LoRa network server.
Prerequisites
Before starting the installation process, ensure you have the following prerequisites:
- Follow the steps provided in this article.
- Build the Lora gateway using Raspberry Pi and a concentrator
- Basic command-line knowledge.
- Access to the Internet to download the necessary components.
STEP 1. The installation
To properly install ChipStack, follow these commands:
- Download ChirpStack from this link (note: it might change in the future)
- sudo apt-key adv –keyserver keyserver.ubuntu.com –recv-keys 1CE2AFD36DBCCA00
- sudo echo “deb https://artifacts.chirpstack.io/packages/4.x/deb stable main” | sudo tee /etc/apt/sources.list.d/chirpstack_4.list
- sudo apt update
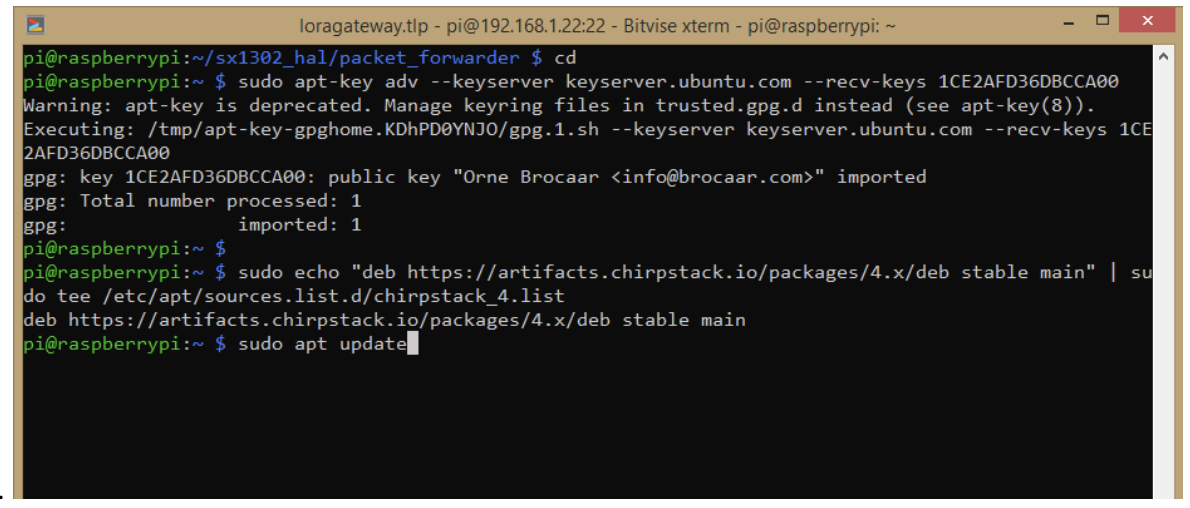
Figure 1. Downloading the ChirpStack.
STEP 2. The importance of Mosquitto and PostgreSQL
When setting up a ChirpStack environment or any LoRaWAN network, the installation of additional components like Mosquitto (MQTT broker) and PostgreSQL (relational database) serve critical purposes. These components are essential for facilitating communication, data management, and overall system functionality.
But why are these components are necessary in a ChirpStack installation? Let’s cover each one to find out.
What is Mosquitto? (MQTT Broker)
Mosquitto is an open-source MQTT (Message Queuing Telemetry Transport) broker that facilitates communication between devices and applications using the publish-subscribe messaging pattern. It serves as a lightweight and efficient messaging protocol, particularly suitable for IoT applications.
MQTT and ChirpStack
ChirpStack employs MQTT as a means of communication between various components in the LoRaWAN network, including for:
- Gateway communication: Gateways (devices that bridge IoT devices to the ChirpStack network) use MQTT to publish data they receive from devices and to receive commands from the network server.
- Device communication: Devices transmit data to the network server through gateways, which then publish this data via MQTT to the appropriate channels for further processing.
- Application Integration: MQTT enables seamless integration between ChirpStack and external application servers, allowing the application servers to subscribe to device data and act on it.
Installing and configuring Mosquitto establishes a reliable and efficient communication channel within the LoRaWAN network, ensuring data flows smoothly between devices, gateways, and application servers.
Installing Mosquitto
Use this command to install Mosquito:
sudo apt install mosquitto
What is PostgreSQL?
PostgreSQL is a powerful open-source relational database management system known for its extensibility, reliability, and support for SQL queries. It offers structured data storage, retrieval, and manipulation, making it suitable for managing various types of data in IoT applications.
ChirpStack uses PostgreSQL as persistent data storage. PostgreSQL 9.5+ is required.
Installing PostgreSQL
Use this command to install PostgreSQL:
sudo apt install postgresql
The PostgreSQL database
Once PostgreSQL has been installed, use the following command to create a ChirpStack role, using “chirpstack” as the password and a ChirpStack database. (note: the pg_trgm extension must be installed as per the below example).
From the CLI:
sudo -u postgres psql
Within the SQL console:
— create role for authentication
create role chirpstack with login password ‘chirpstack’;
— create database
create database chirpstack with owner chirpstack;
— change to chirpstack database
\c chirpstack
— create pg_trgm extension
create extension pg_trgm;
— exit psql
\q
The Redis database
ChirpStack stores device sessions, metrics, and cache into a Redis database (at least Redis 5.0.0 is required).
To install Redis:
sudo apt install redis-server
STEP 3. Installing ChirpStack
To install ChirpStack, use the following commands:
sudo apt -y install chirpstack
sudo chmod 777 -R /etc/chirpstack/
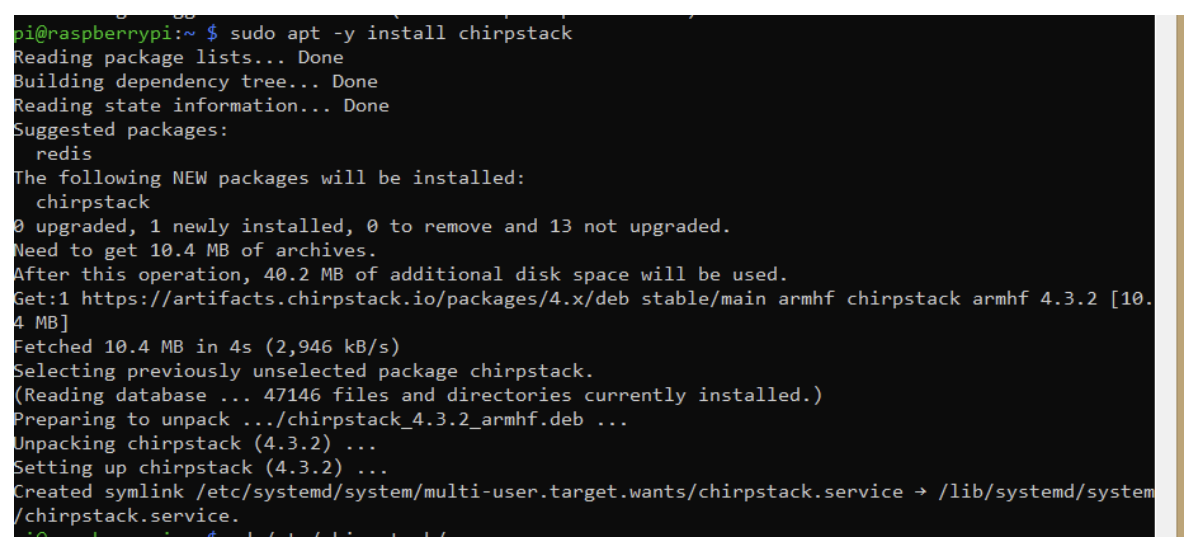
Figure 2. Figure 2 Installing ChirpStack.
It’s necessary to copy a configuration file in the ChirpStack directory.
/etc/chirpstack/chirpstack.toml
Copy the given chirpstack.toml file to this location. This contains an MQTT server ip at line no 319 server=”tcp://127.0.0.1:1883″
Remember to modify this with the IP address of your MQTT server, specifying where you wish to direct the data.
For ChirpStack to work properly, it’s necessary to install the ChirpStack Gateway Bridge, available here. These are the installation steps:
- Enter this command: sudo chmod 777 -R /etc/chirpstack-gateway-bridge/
- Copy the contents of the config file for this Aswell, file chirpstack-gateway-bridge to this location /etc/chirpstack-gateway-bridge/
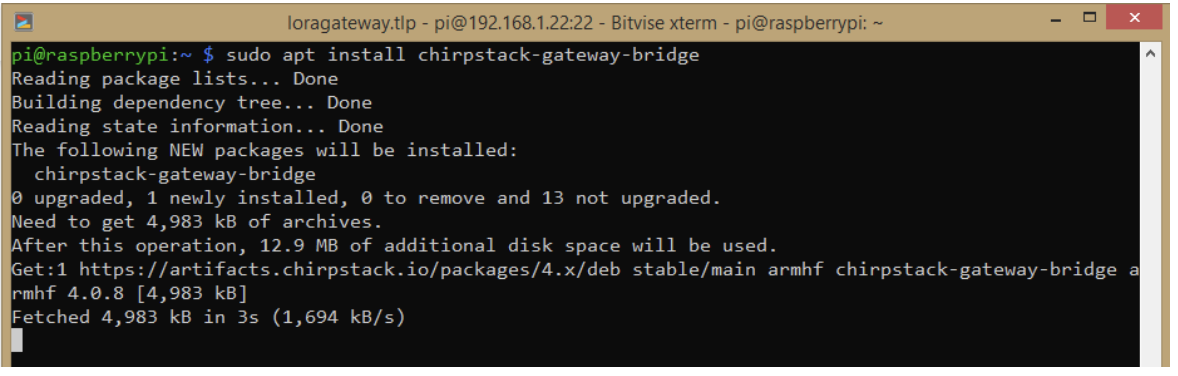
Figure 3. Installing the Gateway Bridge.
STEP 5. The concentrator
Setting up the concentrator to match the IN865 profile is essential for ensuring proper communication between LoRaWAN devices and the network server in the specific frequency band and regional regulations associated with the IN865 LoRaWAN frequency plan.
Remember to copy this file “global_conf.json” to this location exact according to the installation (which can be found in the LoRa-to-node gateway installation article).
~/sx1302_hal/packet_forwarder/
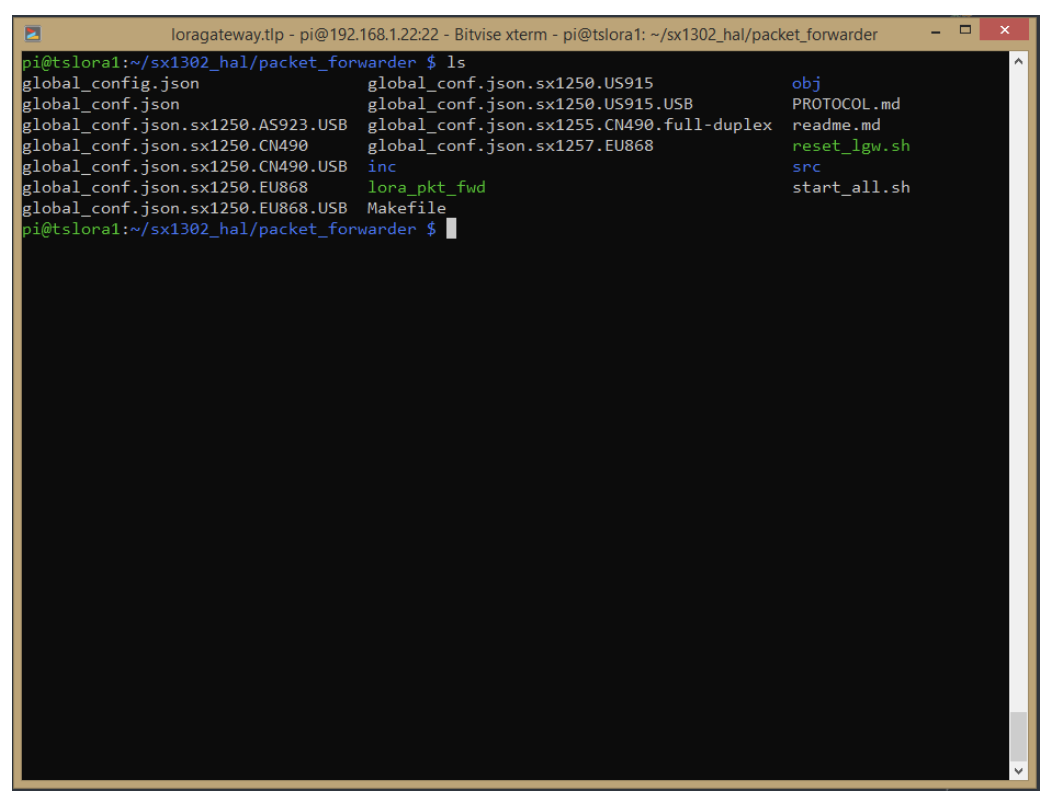
Figure 4. Copying the config file.
On line no. 602 of “global_conf.json,” enter the gateway ID you received. (For guidance, see the article on how to build a LoRa gateway using RPi).
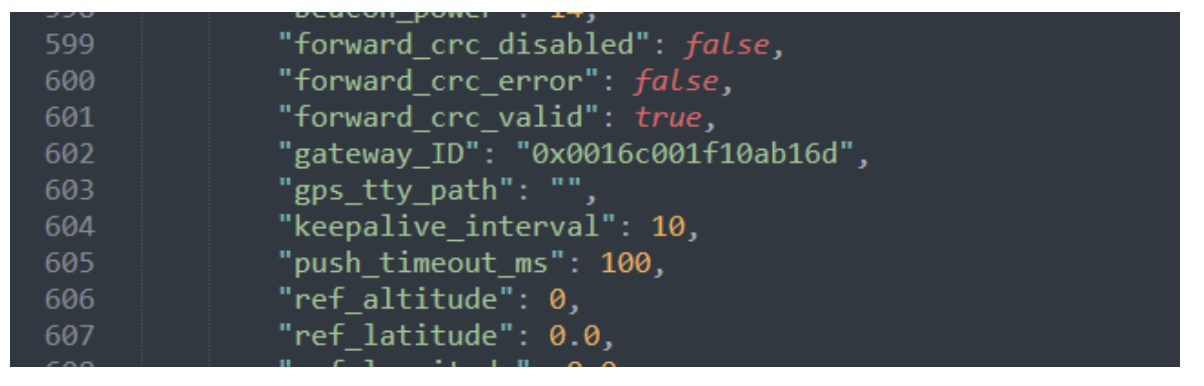
Figure 5. Changing the gateway ID.
STEP 6. Testing, testing, testing
It’s important to test everything to ensure it all works properly.
Enter these commands to test everything in the same order:
sudo service chirpstack-gateway-bridge start
sudo service chirpstack start
cd /home/pi/sx1302_hal/packet_forwarder
sleep 0.1
sudo ./lora_pkt_fwd
If everything works, you should see the following screen.
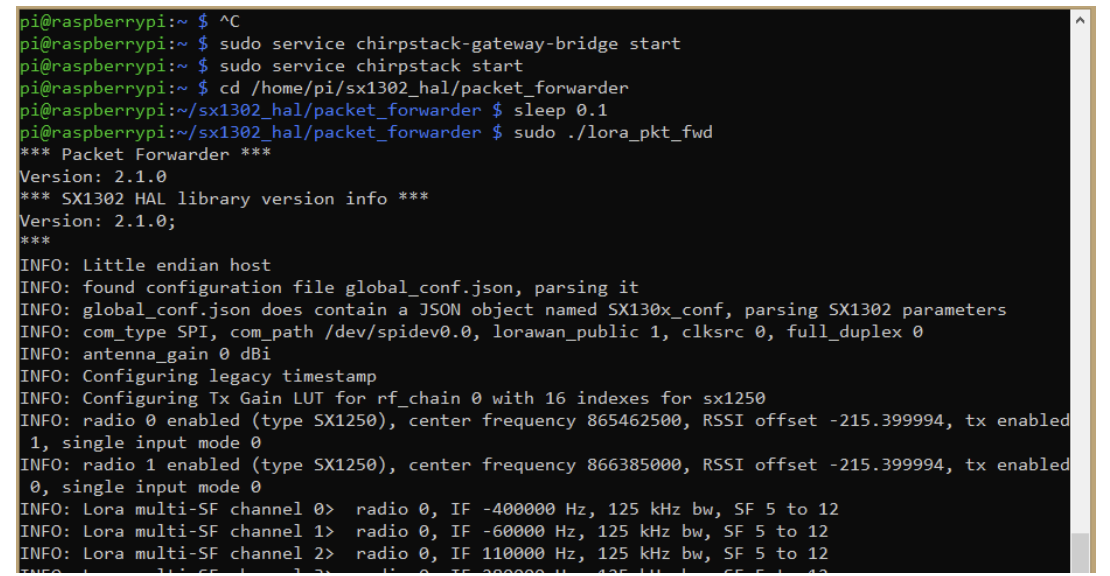
Figure 6. Proper testing.
This screen implies that you can now configure ChirpStack through a user-friendly graphical interface. Previously, it required manual initiation every time Raspberry Pi was rebooted. Now the gateway is live and can be configured.
STEP 7. Adding a gateway to ChirpStack using GUI
To access the GUI, identify the IP address of your system within the same network. To locate your system’s IP address, execute the following command:

Figure 7. The system’s IP address.
In this scenario, we’ve established a connection to Raspberry Pi using Wi-Fi and Ethernet — resulting in two distinct IP addresses.
- ChirpStack can be accessed from either of these IP addresses.
- To access ChirpStack, simply follow this link: https://192.168.1.22:8080/
- Change the IP to your Raspberry Pi.
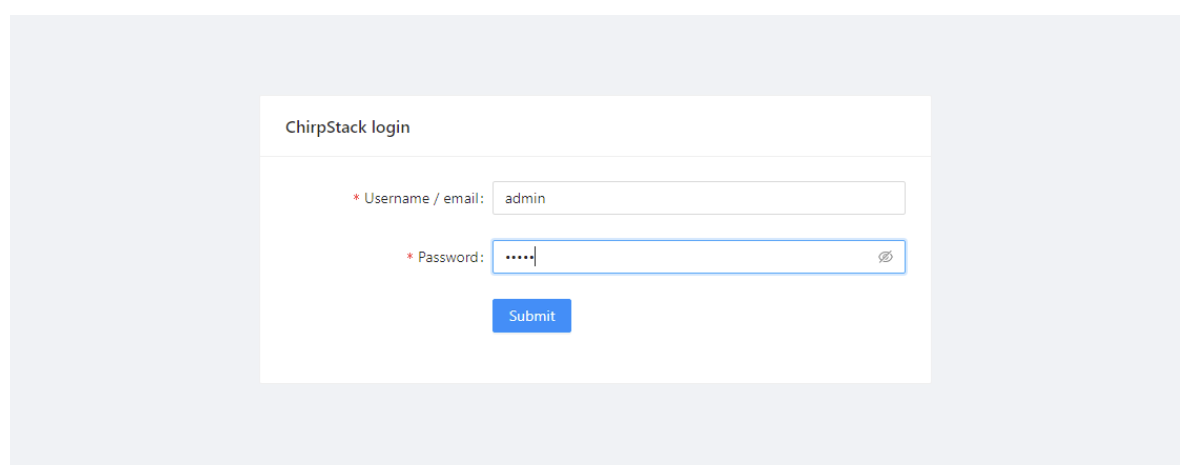
Figure 8. ChirpStack’s login.
For ChirpStack’s login page, the default username and passwords are “admin” and “admin.”
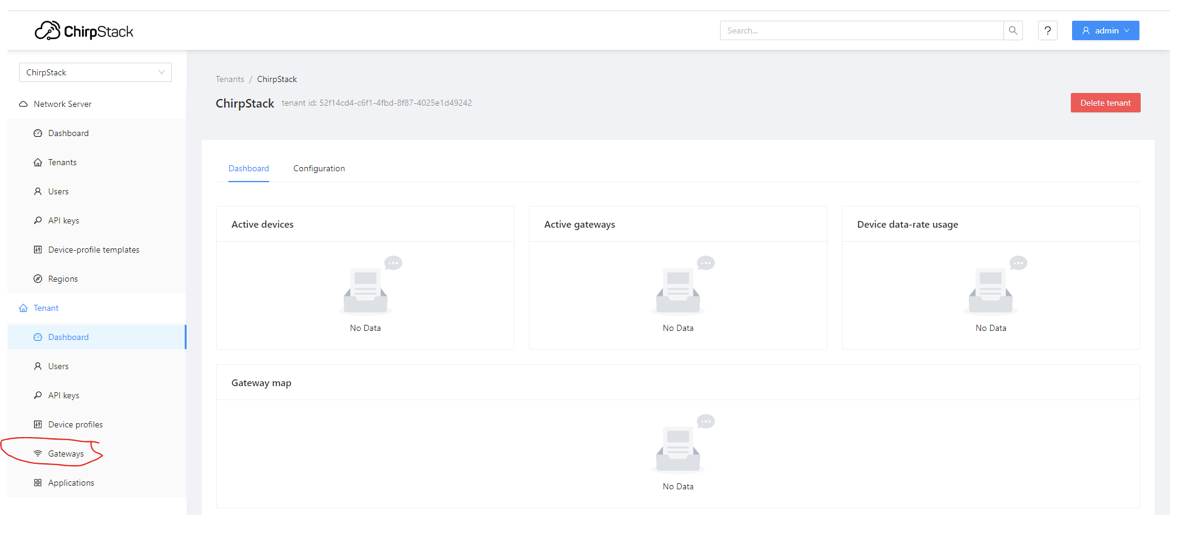
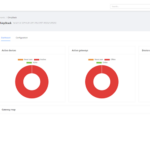
Figure 9. ChirpStack’s dashboard.
After login, choose the “Gateway” option and input the ID that was copied during the initial step (when the concentrator shield’s chip ID was obtained).
The configuration should resemble the following example:

Figure 10. Adding the gateway ID.
It may take a minute, but you’ll soon observe your recently added “Gateway” in the interface. It will be displayed online.

Figure 11. The gateway status.
In future articles, we’ll cover how to use the gateway effectively. To monitor the packets, simply click on a specific gateway and proceed to the “LoRaWAN Packets” section. This feature allows you to inspect the transmitted packets.
If you possess a “transmitter” within the IN865 frequency range, you can monitor its activity and communication through this interface. Stay tuned for more comprehensive guides on harnessing your gateway’s full potential and maximizing your LoRaWAN network’s efficiency.

Figure 12. Receiving the LoRa packets.
You may also like:


Filed Under: Tutorials

Questions related to this article?
👉Ask and discuss on Electro-Tech-Online.com and EDAboard.com forums.
Tell Us What You Think!!
You must be logged in to post a comment.