In this tutorial about LoRa technology, we’ll cover two methods for combining a gateway and server by sending data to a PHP script for storage in a database and redirecting data to an MQTT server. ChirpStack is a powerful LoRaWAN network server that offers versatile integration options for managing and visualizing data.
Let’s delve into both methods with step-by-step instructions for each one. To begin, we’ll create a website to view the LoRa devices’ data.
STEP 1: Setting up XAMPP
XAMPP is a popular web server package that includes PHP, MySQL, and Apache.
Follow these steps to set up XAMPP on Windows:
- Download XAMPP from the official website here.
- Click on XAMPP for Windows.
- Run the installer and follow the on-screen instructions.
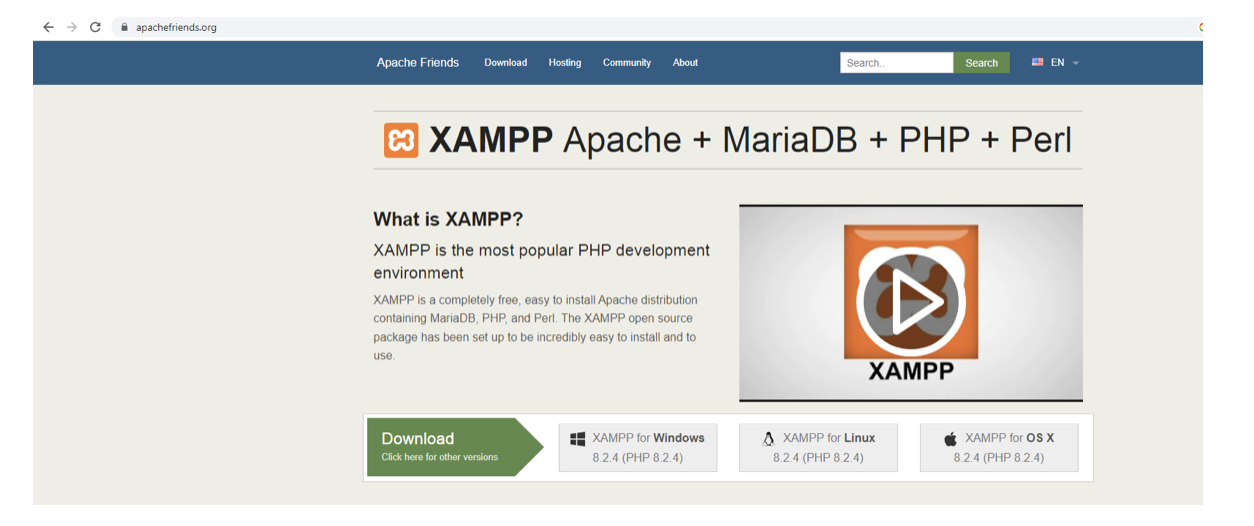
Figure 1. Download XAMPP.
After installing XAMPP, you’ll see the screen below.
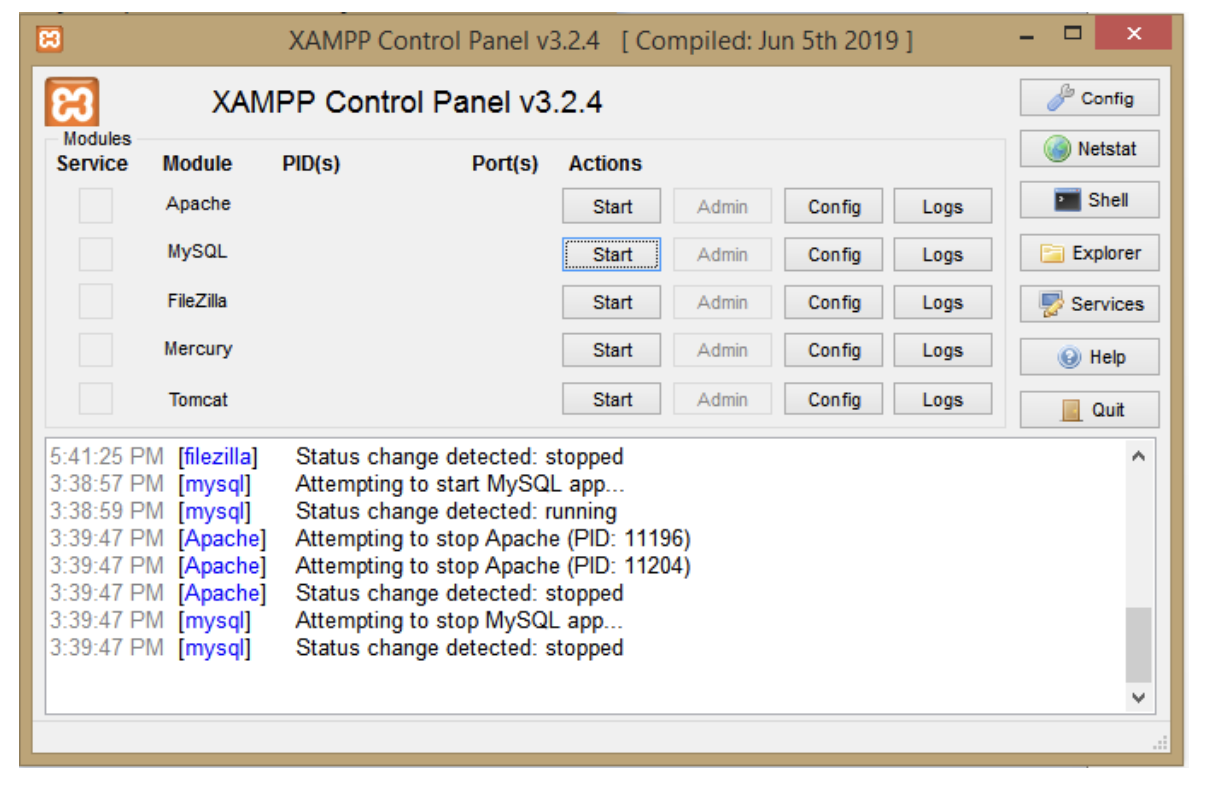
Figure 2. Start Apache and MySQL.
Start the Apache and MySQL services from the XAMPP Control Panel.
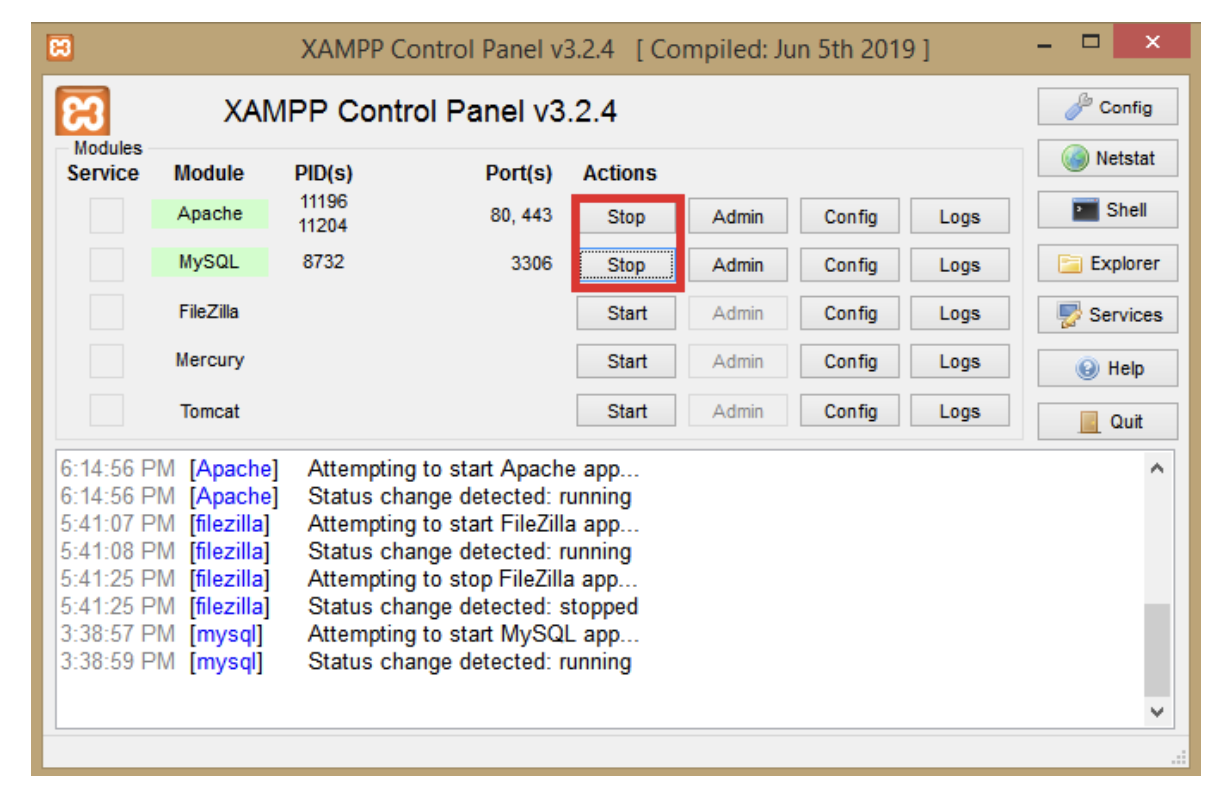
Figure 3. Start the Apache and MySQL services.
Creating a database
To create a database, go to this IP: localhost/phpmyadmin
You’ll see a database dashboard where you can create a new database.
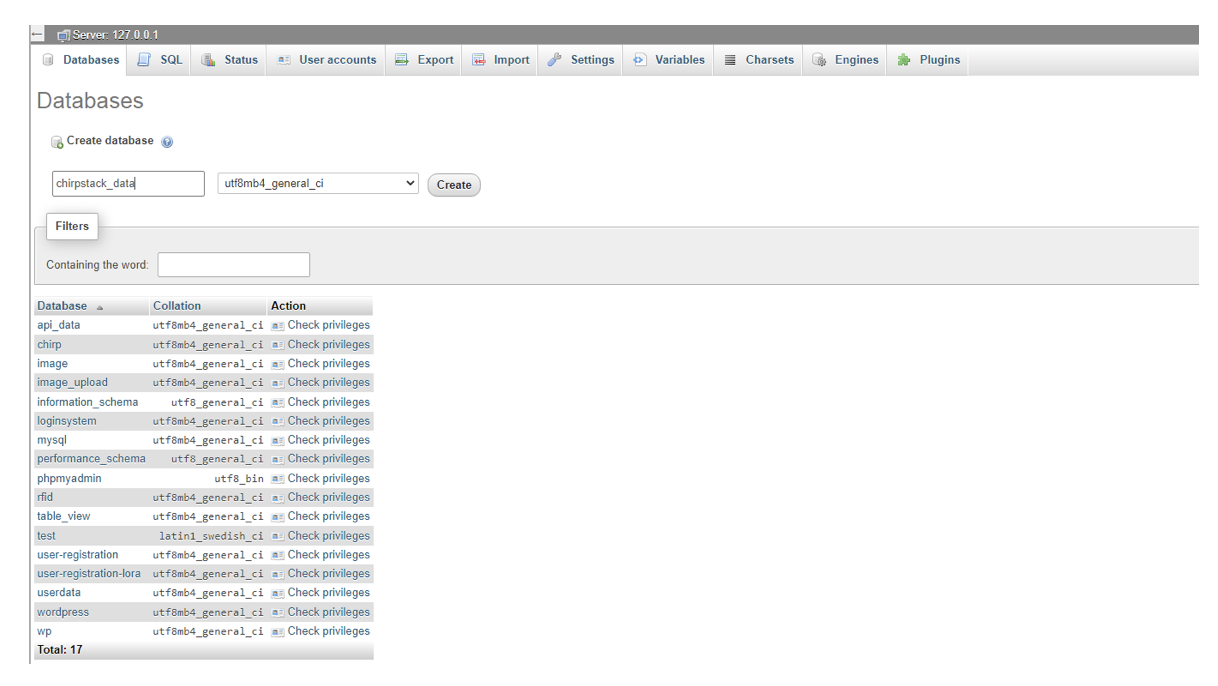
Figure 4. Creating a new database.
Name the database “chirpstack_data,” and then click “create.” You’ll see the following screen.
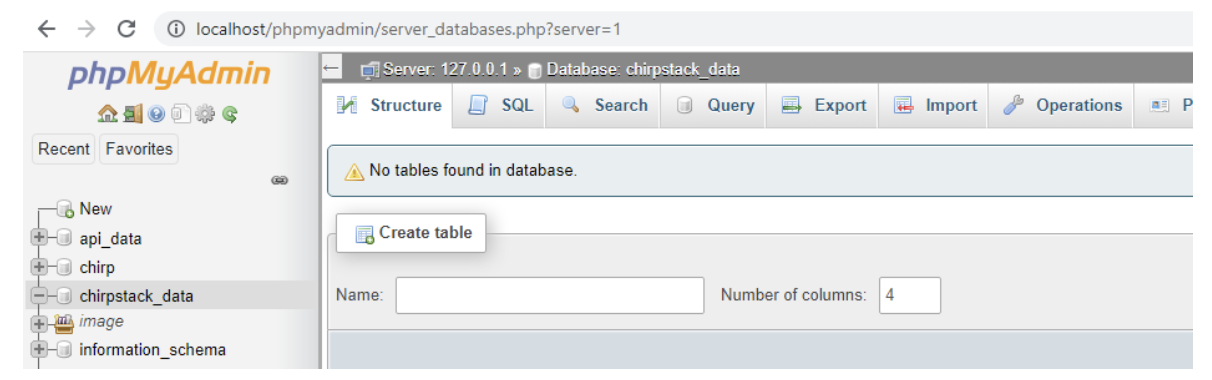
Figure 5. The database.
Any pre-existing databases that you have will be displayed here. Select the one that we just created, called “chirpstack_data.”
Next, we’ll create the tables using this SQL script:
— Create the database if it doesn’t exist
CREATE DATABASE IF NOT EXISTS chirpstack_data;
USE chirpstack_data;
— Create the table to store sensor data
CREATE TABLE IF NOT EXISTS sensor_data (
id INT AUTO_INCREMENT PRIMARY KEY,
device_id VARCHAR(255) NOT NULL,
payload VARCHAR(255) NOT NULL,
timestamp TIMESTAMP DEFAULT CURRENT_TIMESTAMP
);
It should look like this…
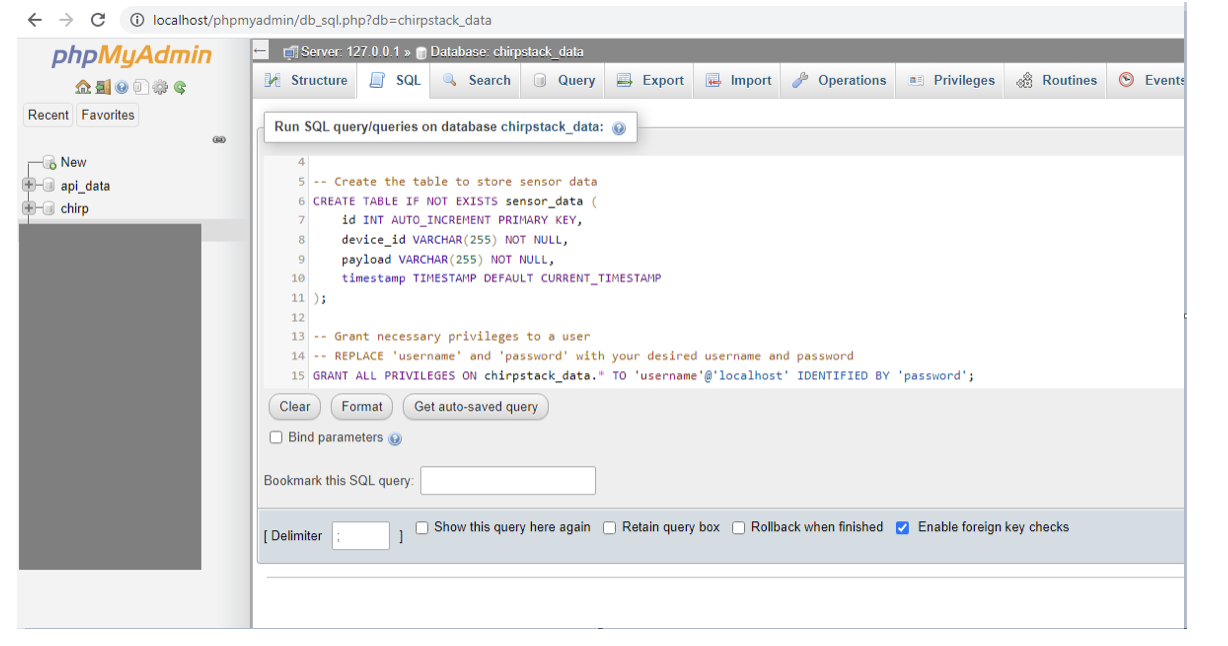
Figure 6. Creating the tables.
Click on the “Go” button at the end to get to the next screen.
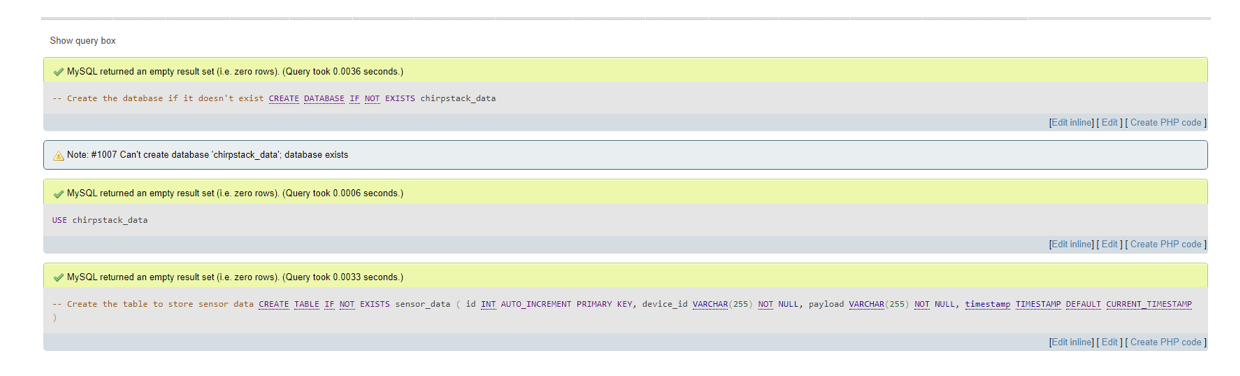
Figure 7. Success in setting up the tables.
This completes the database part of this project. Next, let’s cover to the scripts and data.
Creating PHP scripts
We’ll need to create PHP scripts to store and view data. Here’s how:
- Create two PHP scripts in the XAMPP htdocs directory (usually located at C:\xampp\htdocs\lora\)
- Create the folder “lora” if it’s not already available
- Place both given files into the folder: “store_data.php” and “view_data.php”
We’ll need to redirect our ChirpStack applications to the server we’ve just set up. For a detailed guide, follow the steps outlined in this article on node-to-gateway communication.
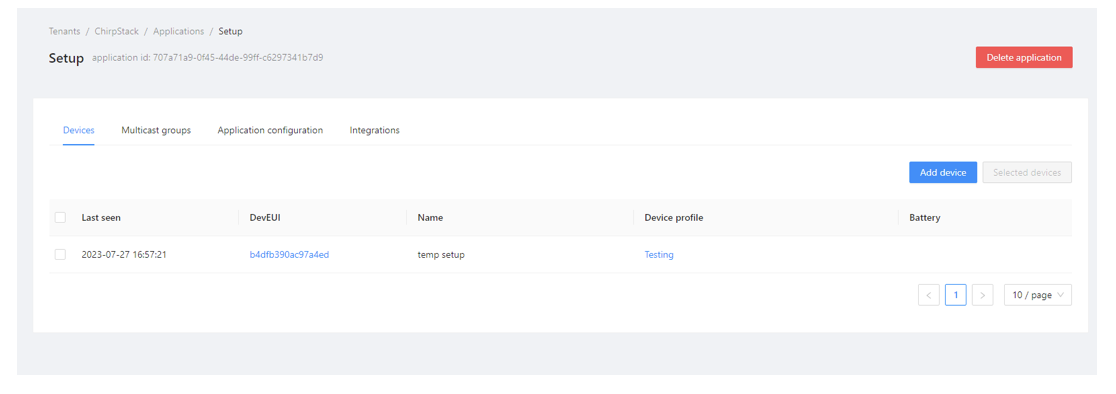
Figure 8. The ChirpStack applications.
Go to your ChirpStack IP and open it: Tenants/ChirpStack/Applications/Setup
You will see the above screen. Click on “integration.”
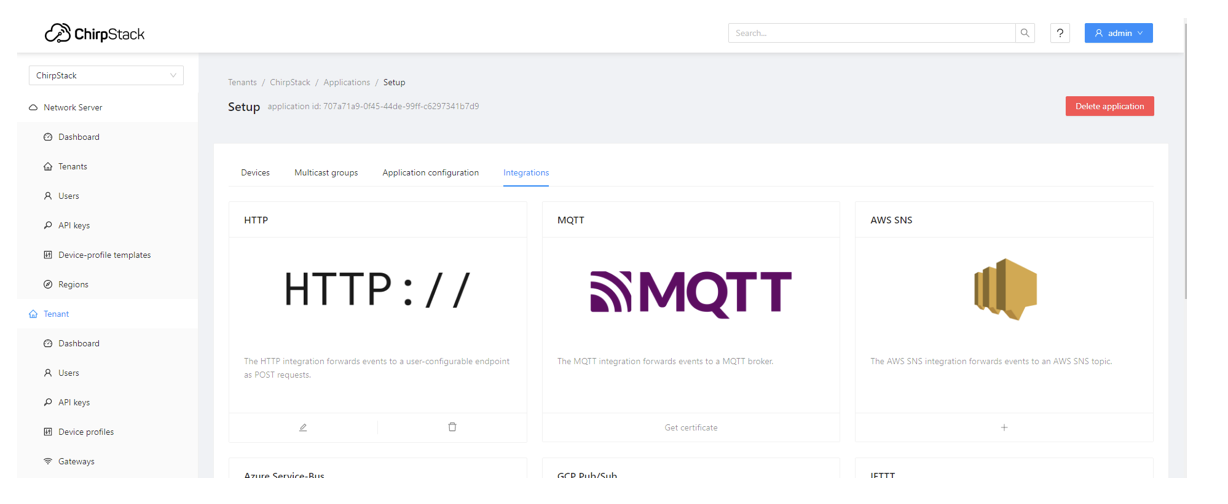
Figure 9. The integration TAB.
Click on the “+” button in the HTTP section. Then, input the system’s IP address where XAMPP is running.
To find out your system’s IP address, execute the command “ipconfig” in the Windows’ Command Prompt.
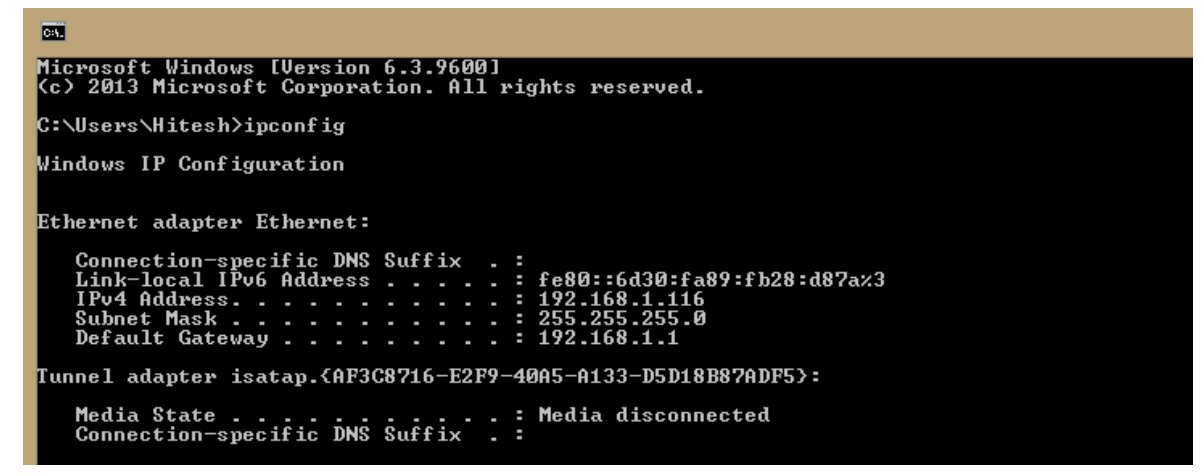
Figure 10. The system’s IP.
Next, enter this IP address in the following format.
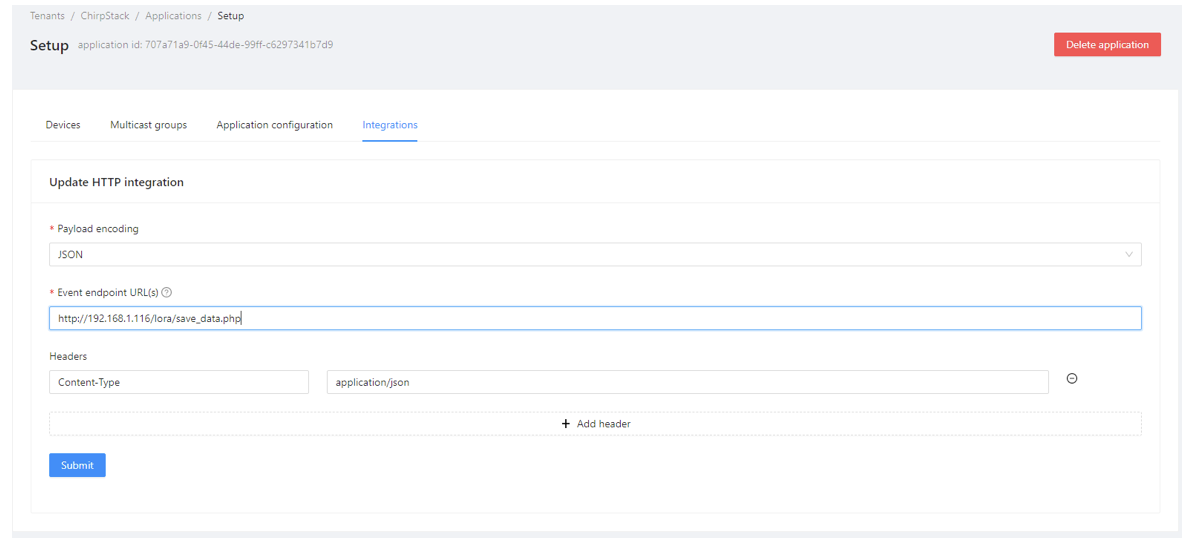
Figure 11. Enter the system’s IP as shown.
To complete the process, follow these steps:
- Under the “Payload” tab, choose JSON as the format.
- Under the “Event Endpoint” tab, input the URL https://192.168.1.116/lora/save_data.php (note: your IP address might vary).
- Click on “Add header” and provide the “Content-Type” in the first tab and “application/json” in the second tab.
- Click on “Submit.”
You’re all set! Try sending data from any device that’s configured.
By following these steps, you’re configuring the settings to ensure data is transmitted as JSON to the specified URL when any of the devices send data.
Testing
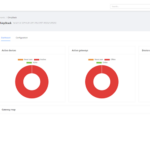
The next task is to ensure the data is reaching our ChirpStack platform.
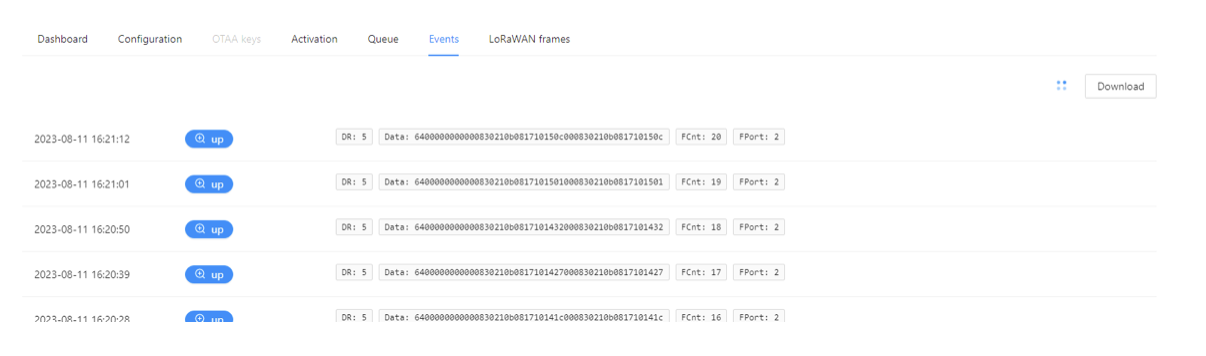
Figure 12. Data arriving in ChirpStack.
Let’s test our script using this address:
http://192.168.1.116/lora/view_data.php
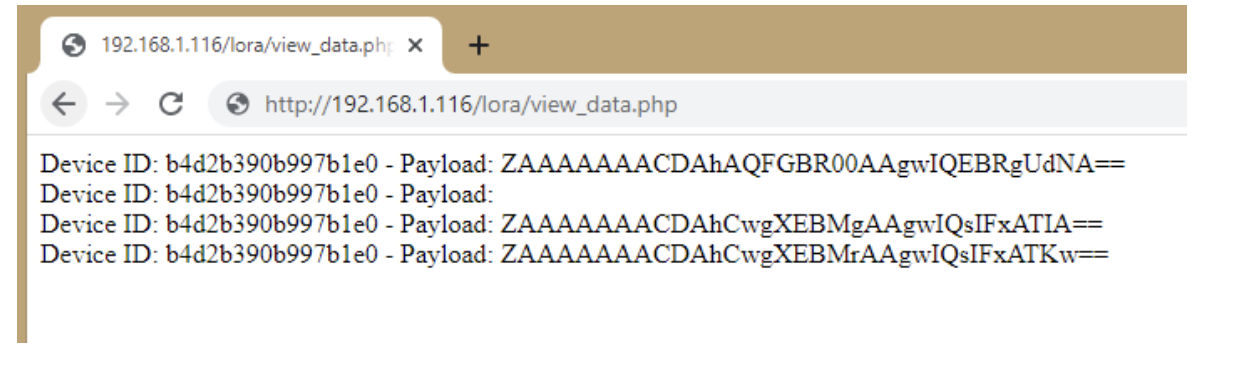
Figure 13. Sending data from ChirpStack to PHP.
You now have the flexibility to create a web dashboard using CSS. We’re successfully receiving ChirpStack data in our PHP scripts, which can be viewed in a web browser.
Redirecting data to an MQTT server
If you want to change the default MQTT server address used for ChirpStack’s internal MQTT communications, you can modify the server attribute in the ChirpStack main configuration file.
Here’s how:
- Locate ChirpStack’s main configuration file, which is typically located at /etc/chirpstack/chirpstack.toml.
- Edit the configuration by opening the configuration file in a text editor and looking for the [application_server.integration.mqtt] section.
- This is where you can change the default MQTT server address.
In our case, it’s located in line no 319.
[application_server.integration.mqtt]
server=”tcp://127.0.0.1:1883″
Conclusion
ChirpStack data integration is accessible through two methods. By using PHP scripts and MySQL databases via XAMPP, you can store and visualize data. Or, if real-time streaming is your goal, redirecting data to an MQTT server offers a quick solution. Thanks to these methods, ChirpStack’s versatile integration options offer a fairly simple way to access IoT data.
You may also like:


Filed Under: Tutorials

Questions related to this article?
👉Ask and discuss on Electro-Tech-Online.com and EDAboard.com forums.
Tell Us What You Think!!
You must be logged in to post a comment.