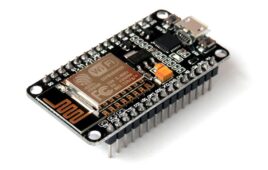
ESP8266, a System-on-Chip (SoC) manufactured by ESpressif, is the most popular IoT development platform is a complete and self-contained Wi-Fi networking solution. The SoC consists of a Tensilica L106 32-bit microcontroller and a Wi-Fi transceiver. Therefore, the chip can be used to self-host an IoT or embedded application or offload Wi-Fi networking functions to another…
Arduino-based RFID door lock
Electronic door locks are safer than conventional door locks. There is no possibility of lock picking in such door locks as the entire mechanism is electronic. Such door locks have an underlying embedded access control system which is generally impenetrable. Several access control systems are used in electronic door locks. The most common access control…
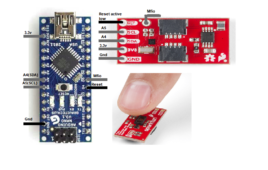
What are Arduino force-sensitive resistors?
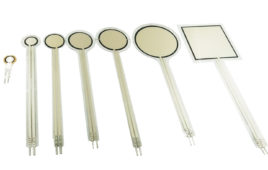
Arduino force-sensitive resistor is a new family member of Arduino traditional resistive sensors. Resistive sensors respond to any physical quantity change by varying their resistance. A fixed voltage is applied across the sensor upon resistance change voltage drops. This voltage drop can be sampled, and physical quantity change can be measured. Generally, in a resistive…
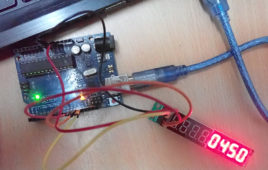
Arduino compatible coding 09: Interfacing SSD with Arduino
In the previous tutorial, we discussed interfacing RGB LEDs with Arduino. In this tutorial, you’ll learn how to interface seven-segment display (SSD) when using Arduino. When interfacing with any kind of display device, Arduino and other controllers use digital output or serial communication. Driving SSDs by Arduino is as simple as driving an LED on it. The seven-segment…
Arduino compatible coding 10: Seven-segment multiplexing using Arduino and MAX7219
In the previous tutorial, we learned how to interface a seven-segment display with Arduino. A seven-segment display is comprised of a unit of eight LEDs and seven of which are bar-shape and one is a dot. These display units are ideal for displaying numbers or letters. For example, they’re often used as a display unit…
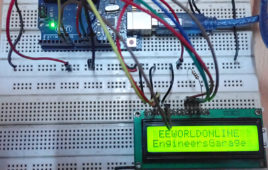
Arduino compatible coding 12: Scrolling long text on the character LCD using Arduino
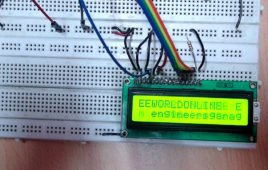
In the previous tutorial, we discussed: The functional blocks of a character LCD How character LCD works and is interfaced with a controller How to display text on a character LCD In this tutorial, we will learn about scrolling long string of text on a character LCD, which can be tricky. A character LCD module has…
Arduino compatible coding 07: Analog input using Arduino
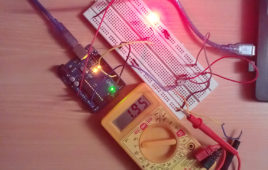
In the previous tutorial, we discussed analog output in the form of PWM signals when using Arduino. We generated a PWM wave from Arduino by employing the analogWrite() function that approximates to a rectified sine wave. It, then, uses that analog output to fade an LED. A controller can interface and interact with external electronic components…
Arduino compatible coding 08: Interfacing an RGB LED using Arduino
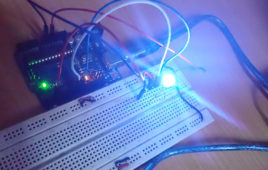
In the previous tutorial, we discussed analog input when using Arduino. So far, we have covered four out of the five ways that controllers can interface and interact with other electronic components and devices. This includes digital output, digital input, analog output, and analog input. In this tutorial, we discuss how to interface RGB LEDs using Arduino.…
Arduino compatible coding 11: Interfacing character LCD with Arduino
In the previous tutorial, we discussed multiplexing seven-segment displays (SSDs). Continuing with the display devices, in this tutorial, we will cover how to interface character LCD when using Arduino. Character LCDs are the most common display devices used in embedded systems. These low-cost LCDs are widely used in industrial and consumer applications. Display devices in embedded systems…
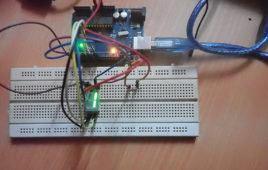
Arduino MFRC522 RC522 RFID reader interfacing & access control
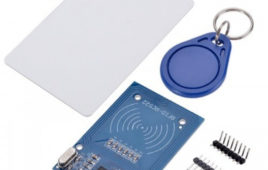
RFID is a popular tagging and identification technology. Radio frequency identification involves one RFID tag and the second RFID reader. RFID tags and labels are low-cost and easily available. Compared to barcode tracking systems, RFID solutions have several advantages. One of the apparent advantages of RFID over barcodes is that it does not require a…
How to use MPU6050 6-axis (gyro + accelerometer) MEMS motion tracking sensor with Arduino
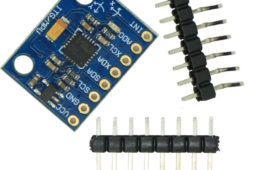
Motion tracking sensors are used in applications like robotics, gesture recognition, vehicle stabilization, position control in drones/quadcopters, pointing devices, game controllers, and fitness tracking devices. One of the popular motion tracking sensors is MPU6050. It is a six-axis MEMS motion tracking sensor that includes a MEMS accelerometer and a MEMS gyroscope. The sensor also has…
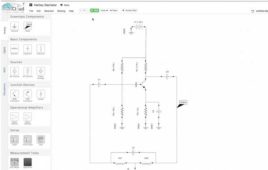
Online & Offline Circuit Design Software for Beginners and Professionals
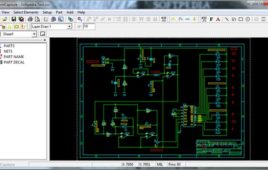
The technological advancement and easy access to internet have made everything convenient for the masses, be it a routine activity or a professional task. Previously, we covered the list of apps, tools, and simulators for electronics designers that render great ease in the completion of electronic projects. Likewise, there are various online software that can assist the engineers while dealing with the circuits. These software allow everyone to learn and design circuits for both educational and professional purposes. Here is a compilation of online & offline circuit design software that are quite popular among the designers and hobbyists.
10 Online Circuit Simulators for Dealing with Electronics Projects
There are some web-based simulation tools that aid the professional engineers and hobbyists in learning as well as carrying out various experiments related to the circuits. In this post, we are going to cover a compilation of such online circuit simulators that offer a great help while dealing with the electronics projects. You may also refer to our previous blogs on electronics apps, circuit design software, and PCB design tools.
How to use an oximeter and heart-rate monitor with Arduino
An oximeter is a device that measures the amount of oxygen carried by a person’s red blood cells. Oxygen provides energy for our bodies, supports the immune system, helps replace cells that degrade, and more. Low blood oxygen levels can indicate certain health issues. These levels can also decrease as we age, so it can…
Arduino-based electronic leveling device
Have you ever struggled to fix nails on a wall perfectly parallel to the floor or ceiling? In this project, we have modeled an electronic-level device useful in placing anything perfectly parallel. This device is prototyped on the popular microcontroller board – the Arduino. It uses very few components to build, only an accelerometer sensor…
How to use ILI9486 driver 3.5″ TFT LCD touch screen with Arduino
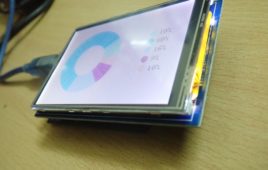
In this project, we will design a simple application using a 3.5-inch TFT LCD that displays different kinds of graphics and text messages with Arduino. TFT LCDs are the most popular color displays – the displays in smartphones, tablets, and laptops are actually the TFT LCDs only. There are TFT LCD shields available for Arduino…
Arduino-based heartbeat monitor with graphical heartbeat display
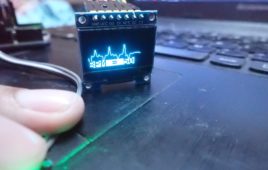
The measurement of pulse rate or heartbeat is a very common medical procedure. Quite often, the patient kept under observation is essentially monitored via their pulse/heartbeat rate. Pulse rate varies from person to person. The pulse is lower when we are resting because at that time, the body does not need much oxygen, and the…
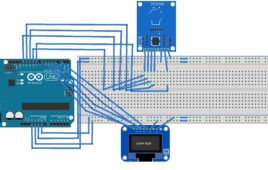
How to interface SSD1306 OLED with Arduino using SPI
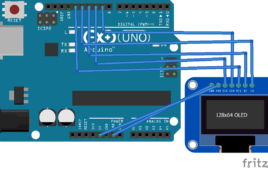
SSD1306 is a popular OLED display driver. Portable and wearable devices are the new trends. Small OLED displays are just perfect for such compact and portable devices. SSD1306 is a single-chip CMOS OLED/PLED driver. It can manage a 128×64 dot-matrix graphic display. It is designed to control common-cathode OLED panels. The chip has several built-in…
Insight into Arduino: Beginner’s Guide
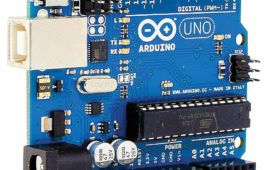
Arduino is an open-source electronics prototyping platform based on flexible hardware and software, whereby the standard schematic can be used by anyone so as to make their own version of an Arduino board. An Arduino contains a physical programmable circuit board named microcontroller and software termed as IDE (Integrated Development Board). All the Arduino boards should be compatible with this IDE which is used to upload the computer code on the physical board.There are some very unique features contributing towards its exponential growth in the electronics world. It doesn’t need a separate piece of hardware to load the code on the board. Rather it can be done simply with a USB cable. Moreover, its IDE uses a simplified version of C++ which enables the beginners to get acquainted with programming in a convenient manner.
Designing an Arduino-based EMG monitor
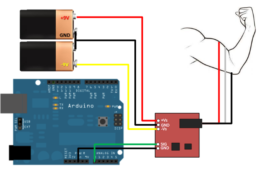
Electromyography (EMG) is a medical procedure that evaluates the health conditions of muscles and nerve cells. These cells transmit electrical signals that cause muscles to contract or relax. EMG is used to read these signals and plot them as numbers or graphs. Typically, EMG is performed by doctors as one part of a diagnostic tool…